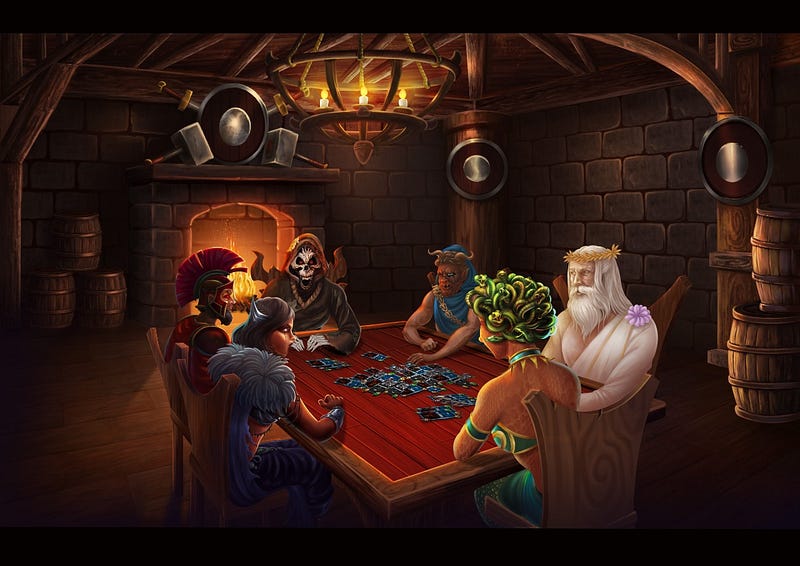
Learn what goes into building a great competitive deck!
One of the most important arts to master in any CCG is that of deck building. A well-built deck can do a lot with a little, and your win rate (and general enjoyment) can climb exponentially by making small improvements to your deck. It doesn’t have to break the bank either!
Berserk is still expanding and the card library is a little limited right now – but more cards are coming every season. With more variety, more styles of play will become viable. Getting a handle on some of the basic concepts early on can pay massive dividends in future seasons!
In this article we’re going to outline some basic tips for deck building. We’ll go over some of the questions you need to ask yourself when designing a deck, and what to look out for when playing to help improve your deck. We’ve also pulled together a couple example builds to help give you some inspiration, ranging from totally F2P up to full-on whale level!
Deck Building Background Theory
At a very basic level, any deck will typically fall into one of four high-level categories known as archetypes. These are based on its play style and victory conditions. The main archetypes are:
· Aggro
· Control
· Midrange
· Combo
But what do these mean exactly?
Aggro (Aggressive): This archetype is about hitting hard and hitting fast. If you haven’t won by Turn 6, you’ve probably lost. Typically sacrificing caution, board control and any consideration of defense, an aggro deck has one goal: kill your opponent before they have a chance to even get going. An aggro build has a very low Lava curve (more detail on that later) and typically has no late game back up plan. You either win quick, or you run out of puff. High risk, high reward.
Control: Control is essentially the exact opposite of Aggro, it’s about slowing the pace of the game down. Controlling the situation. Delaying and building towards a late game big play. Where an aggro player is typically proactive, a control player tends to be reactive. Looking to gain long-term card advantage through efficient responses to opponents plays, grinding them down in a longer war of attrition. Control wins through efficient response to enemy threats (they play 2 creatures, you remove both with 1 spell etc.), disrupting opponents combos, dragging the game past your opponents target win point, and generally reducing the value of anything they try and play. Control is often a difficult play style for new players, requiring a good knowledge of the current meta, and the likely cards your opponent is going to play, and when, to ensure you have the right responses ready when you need them.
Midrange: Midrange can really be seen as a compromise between Aggro and Control. With the flexibility to respond to either aggressive plays with defensive attrition, or to force control players into a race for tempo. It wins by just about out-trading against aggro or being just slightly quicker to the end game than a control deck.
Combo: Combo decks are built around one (or several) specific interactions between cards. They require careful assembly, timing, and protection of several parts to achieve a game winning play. They manage their goal in (usually) spectacular fashion, or get disrupted enough to prevent them from ever achieving their objective.

Many decks will combine aspects of multiple archetypes, but the more you try and cram into one deck, the less consistent it becomes – often ending with having all the wrong parts at the wrong time.
When starting out, keeping things simple can often lead to better outcomes. A few things to keep in mind:
Have a win condition: What’s your general plan? Do you want to outlast your opponent? Beat them before they get going? Build up to one specific big play?
Maximize consistency: You can include 2x of any card in a deck. That means a maximally lean deck has just 15 unique cards (2x copies of each) which ensures the most consistency in getting the cards you need each game. Of course, sometimes its important to compromise consistency, for a little flexibility.
Pay attention to your Lava curve: Based on your win condition, you should know if you’re trying to win in the early, mid, or late game. Make sure that your distribution of cards reflects your win tempo! An aggro deck aiming to win Turn 6, probably doesn’t need a 9 Lava card. And likewise, a late game deck probably doesn’t want 18x 1 Lava cards.
Lava Curve
One easy way of visualizing your tempo is to look at your Lava curve. Displayed on the deck building screen your Lava curve shows you how many cards you have at each Lava cost. Seeing where your deck peaks will tell both what cards you’re more likely to see, and where in the game you’ll “get into high gear” as it were. If your deck has an average Lava cost around 2, you’ll be playing cards early and often – and probably run into card draw issues as you play more than you draw. If your curve peaks around 6 Lava, you may find yourself with a hand full of cards you can’t play (and losing before you ever make it to that point)!
Understanding and adjusting your curve is an important aspect of balancing a deck. As you play matches, pay attention to how they go — are you running out of cards? Are you missing turns? You’ll get a feel for if your curve needs to be adjusted after testing it a bit.

Things to keep in mind
The following questions don’t necessarily have right or wrong answers, but ask yourself when building a deck:
Tempo or Inevitability? Does your ideal match rely on playing specific cards on specific turns, hitting key plays before your opponent? Or do you intend to just survive long enough to outlast whatever your opponent had planned?
Redundancy or Key? Do you have multiple win cons/multiple ways of getting to your win con? Or does your deck have one spectacular play, and if that gets disrupted that’s it? Knowing how important any specific card is to your strategy can help you decide when and how to play them to guard the pieces that need to be guarded.
Is your deck full of Threats, or Answers? And does that ratio fit with your chosen archetype/win con? A threat is any card that could potentially win the game if left unchecked (this could be as simple as a creature that scales infinitely, or a part of a larger combo that leads to a much nastier play later if left alive). Answers are cards that remove threats. Do you have the right balance, and do you have the right answers? If your plan involves remaining reactive more than proactive, you’ll want a higher ratio of answers: threats. Likewise, an aggressive approach probably warrants the opposite.
Some Example Decks
Free Deck:

This totally free-to-play (F2P) build is a creature-heavy Midrange deck. In early turns you’ll look to capitalise on the host of cheap Undead cards for quick direct damage. With the low HP of these cards, you won’t be controlling the board state. Aim for quick hits to the face and use targeted removal, or your Lion Gates (below) to delay key creatures your opponent plays. Several Rage creatures provide the mid-game threat, and use of a couple key Taunts can keep those alive long enough to be a pain. You’re unlikely to be dominating the board state entering the late game, but a clutch Libation could see you clear out any pesky taunts before dropping the last 1 or 2 damage you need to secure your win. Going late isn’t impossible with this deck, but you will feel a little light on staying power past Turn 7. The lone Breeze of Boreas can give you that small burst of Lava to play a card 1 turn ahead of schedule. Saving this to drop a Cyclops Defender or Libation a turn early is probably the best use. But don’t be afraid of using it early if it can help save one of your bigger threats!
Pauper:

This pauper deck is an aggro-control build. Substituting in some of the common NFT Undead cards and cutting back on the number of Taunts compared to our F2P example above means the damage comes hard and fast. Use of a rented Wolfshadow Vulcanite gives access to a very efficient creature removal ability, and spells such as Polymnia’s Counsel (below) and Eye of Typhon should be used to remove tricky creatures from your opponent. You’re on the clock with this build. You’ll want to use your Lava gain early and get some more damage out before your opponent has a chance to stabilize and probably want to respond to threats immediately. Taunt creatures are going to be your biggest hurdle – because most of your creatures will be glass cannons, trading into Taunt is rarely going to be cost effective for you.
Salmon:

Cracking open the piggy bank slightly, this deck has 20/30 NFT cards alongside a rented Level 2 Vulcanite. Very much a control deck, you’ll be looking to go late game here. Focusing on grinding your opponent down, every trade needs to be favorable and you need to push to eke out card advantage before Turn 7. Early turns will be about maintaining board control. You’ll be doing very little direct damage to begin with. Heavy use of Stun and Reborn cards to ensure favorable trades will be critical to making sure you hit the late game. Snares of the Fae and Javelins of Thanatos (below) will ensure explosive late game turns that are difficult to deal with. It will be important to ensure that you force out any spell based removal from your opponent on lesser threats, to maximize the impact of these late game cards.
Dolphin:

We’re going a little wild here! This Control/Combo Deck has some of the strongest cards you’ll find in the current meta, just lacking those top shelf legendaries. A creature-heavy Control deck, you’ll be grinding your opponent down, relying on the multitude of summon mechanics to keep your board and hand topped up until your opponent finally exhausts themselves. 2x Forgotten Spartoi, 2x Stranglevines, 1x GGGO gives you more Reborn than you can shake a stick (or targeted kill spell) at, and 5x Stun creatures in the early game will have your opponent pulling their hair out as you slowly chip away at their threats while maintaining a healthy board. 3x gain Lava cards give you flexibility at any point in the game, and unless they’re literally your last 3 cards you should always have an impactful opportunity to use them. The deck is a little light on targeted removal, so efficient trades with creatures are going to be critical to maintaining your stranglehold on your opponent.
Whale:

If I were a rich man (Ya ba dibba dibba dum)…
Very similar to our previous control deck, we sub in more of the expensive Lava gain card Storm Surge for increased reliability and sub out one Scorpion Stance for an Edge of Night. Edge of Night is a showstopper legendary that can buy you a turn in the mid game, or be the precursor to a much larger combo play (but be sure to finesse out your opponents Eye of Typhon kill cards before playing it though, or risk an easy counter)! Sunfire Strike replaces Libation to have the same effect, but with the added bonus of summoning a 3/3 creature, and not costing you 10HP!
The same general strategy still applies — grind your opponent down, prevent them from having any board presence, and when they do, prevent them from doing anything via your sturdy taunt cards. We ditch the early game Rip and Rend, and the late game GGGO for 2x Myrmidon Warriors (some of the most Lava efficient damage in the game, at a potential 11 damage for just 6 Lava)!
We hope that you enjoyed our guide to deck building in Berserk! Join the community on Discord if you have any tips or tricks you want to share with other players, or to give us feedback on the game.